> ## Documentation Index
> Fetch the complete documentation index at: https://docs.boundless.network/llms.txt
> Use this file to discover all available pages before exploring further.
# Prover Quick Start
> Run a prover on Boundless.
## Getting started with an AI agent
Paste this prompt into your AI coding agent (Claude Code, Cursor, Copilot, etc.) to get started:
```text theme={null}
Clone https://github.com/boundless-xyz/boundless, read the skill file at
.claude/skills/setup-prover/SKILL.md, and walk me through deploying a Boundless
prover to my GPU server.
```
The monorepo includes a [`setup-prover`](https://github.com/boundless-xyz/boundless/tree/main/.claude/skills/setup-prover) skill with step-by-step guidance for Ansible-based deployment, config tuning, and troubleshooting. See [AI Agents](/provers/ai-agents) for more.
***
## Requirements
A recommended minimum configuration for proving performance:
* CPU - 16 threads, reasonable single core boost performance (>3Ghz)
* RAM - 32 GB
* Disk - 200 GB of solid state storage, NVME / SSD preferred
* GPUs: at least one NVIDIA GPU with >= 8GB of VRAM.
* In testing, we've found the best performance on the following NVIDIA GPUs: 4090, and L4.
* While it's possible to use a single GPU, we recommend at least 10 GPUs to run a competitive prover.
* OS: Ubuntu 24.04 Full Virtual Machine or Bare Metal
The following tutorial will *not* work on standard dockerized cloud providers such as [Vast.ai](https://vast.ai) as the proving stack relies on Docker. We are in the process of working on some `supervisord` scripts and Docker images that would allow for a much cleaner setup in dockerized environments.
## Clone the Boundless Repo
We recommend using Ubuntu 24.04 for your proving node.
To get started, first clone the Boundless monorepo on your proving machine, and switch to the [latest release](https://github.com/boundless-xyz/boundless/releases):
```bash theme={null}
git clone https://github.com/boundless-xyz/boundless
cd boundless
git checkout release-2.0
```
## Install Dependencies
This stage can be skipped if you already have docker and docker-nvidia installed.
To run a Boundless prover, you'll need the following dependencies:
* [Docker compose](https://docs.docker.com/compose)
* [Docker Nvidia Support](https://docs.nvidia.com/datacenter/cloud-native/container-toolkit/latest/index.html) (*Note: the install process requires enabling NVIDIA’s experimental packages*)
For a quick set up of Boundless dependencies on Ubuntu 24.04, please run:
```bash theme={null}
sudo ./scripts/setup.sh
```
### Setup Environment Variables
You'll need to set two environment variables:
```bash Terminal theme={null}
export PROVER_PRIVATE_KEY=""
export PROVER_RPC_URL=""
```
`PROVER_PRIVATE_KEY` is the wallet that represents your prover on the market; make sure it has funds.
For the RPC URL, recommendations differ by chain:
* **Base mainnet** (chain ID `8453`): [Alchemy](https://alchemy.com) or [Quicknode](https://www.quicknode.com/) paid plans.
* **Taiko Alethia** (chain ID `167000`): [dRPC](https://drpc.org/chainlist/taiko-mainnet-rpc) offers paid Taiko mainnet endpoints (Alchemy and Quicknode do not currently support Taiko). Taiko's public RPC at `https://rpc.mainnet.taiko.xyz` also works in practice.
To run a prover on multiple chains, use per-chain env vars instead of or alongside `PROVER_RPC_URL`:
```bash Terminal theme={null}
export PROVER_RPC_URL_8453="https://..." # Base mainnet
export PROVER_RPC_URL_167000="https://..." # Taiko Alethia
```
The broker only serves chains it discovers an RPC URL for; chains without one are silently skipped. After starting the stack, check `just prover logs` for a `Starting pipeline for chain` line per expected chain.
Free RPC tiers can be sufficient for low-throughput provers; `ChainMonitorV2` (the new default in v2.0) reduced per-block RPC load substantially. We still recommend paid plans for production to handle traffic spikes without hitting rate limits.
## Running a Test Proof
We make use of [just](https://github.com/casey/just?tab=readme-ov-file#just) to make running complex commands easier. To see available `just` commands for Boundless, run `just` within the root `boundless/` folder.
Boundless is comprised of two major components:
1. *Bento* is the local proving infrastructure. Bento will take requests, prove them and return the result.
2. The *Broker* interacts with the Boundless market. Broker can submit or request proves from the market.
To get started with a test proof on a new proving machine, you'll need to install the `bento_cli`:
```bash theme={null}
cargo install --locked --git https://github.com/boundless-xyz/boundless bento-client --branch release-2.0 --bin bento_cli
```
Once installed, you can run bento with:
```bash Terminal theme={null}
just bento
```
This will spin up bento without the broker. You can check the logs at any time with:
```bash Terminal theme={null}
just bento logs
```
To run the test proof:
```bash Terminal theme={null}
RUST_LOG=info bento_cli -c 32
```
If everything works, you should see something like the following:
 ## Running the Prover Setup Wizard
Once Bento is running successfully, it is time to configure the [broker](/provers/proving-stack#what-is-the-broker). The [Boundless CLI](/developers/tooling/cli) provides an interactive setup wizard (`boundless prover generate-config`) that derives optimised settings from your machine and writes them to [broker.toml](/provers/broker#settings-in-brokertoml) and the compose files.
The Boundless repo ships two compose files:
* [`prover-compose.yml`](https://github.com/boundless-xyz/boundless/blob/main/prover-compose.yml): the default prover stack (Redis-only, uses the prebuilt `prover-agent` image). `just bento` and `just prover` run this unless `PROVER_STACK=legacy` is set.
* [`compose.yml`](https://github.com/boundless-xyz/boundless/blob/main/compose.yml): the legacy/dev stack (Postgres + MinIO + Redis, builds the agent image locally).
The setup wizard writes the same derived settings (currently `exec_agent` replica count and `SEGMENT_SIZE`) to both files, so you only need to edit the one matching the stack you run.
### Install the Boundless CLI
First, install the Boundless CLI (the Boundless CLI is separate to the Bento CLI we installed earlier):
```bash theme={null}
cargo install --locked --git https://github.com/boundless-xyz/boundless boundless-cli --branch release-2.0 --bin boundless
```
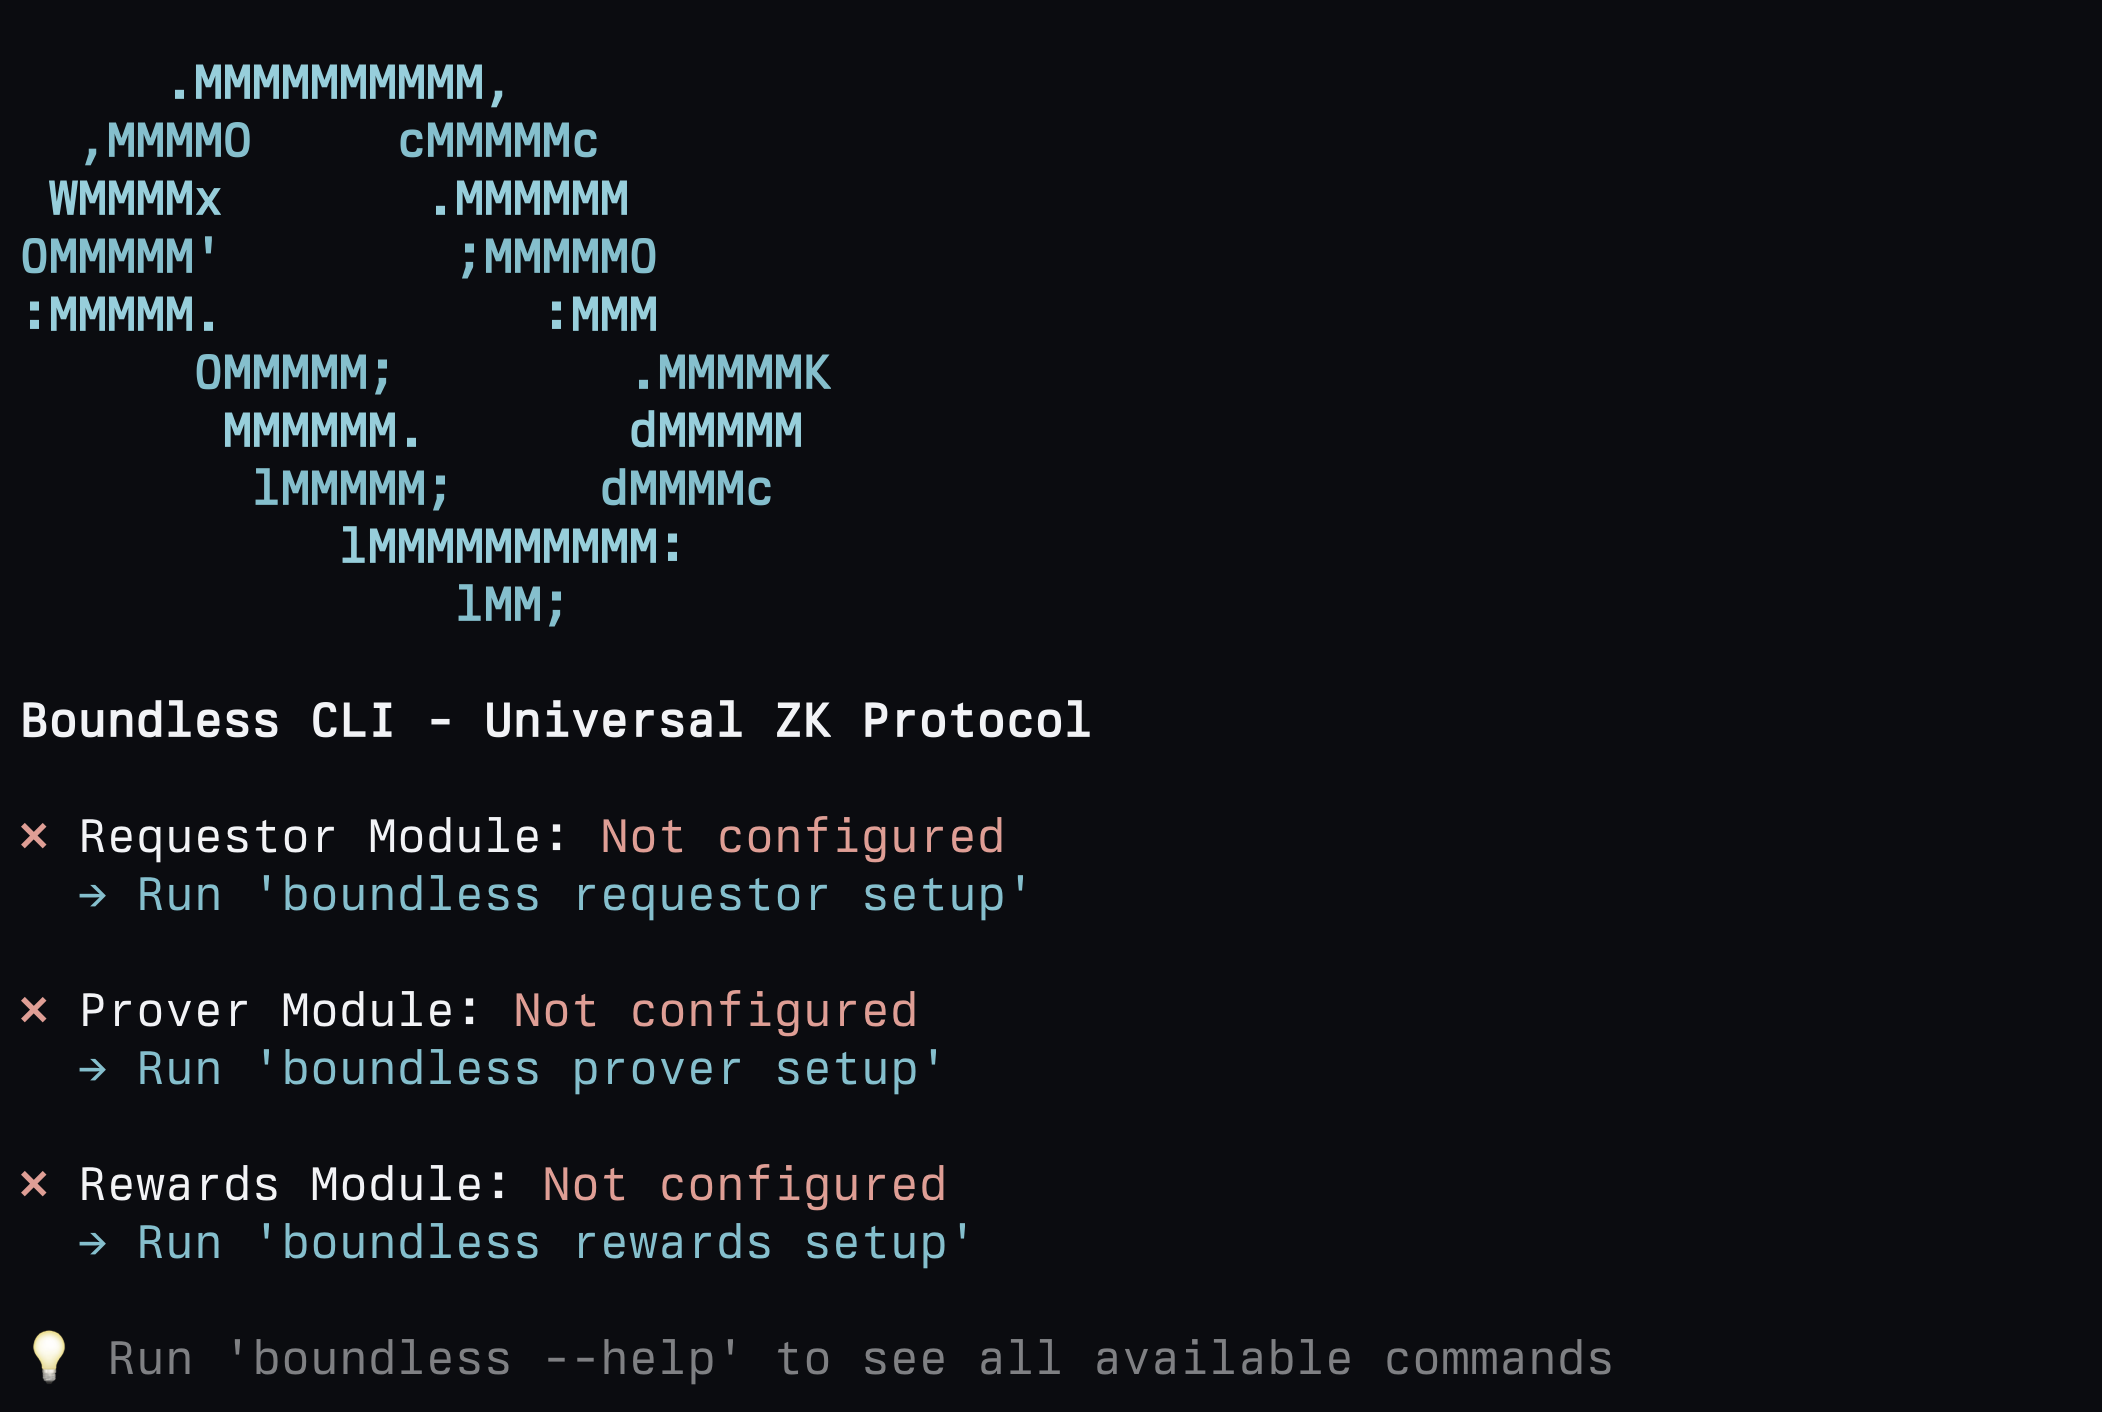
Once installed, run `boundless` to check it has been installed properly:
## Running the Prover Setup Wizard
Once Bento is running successfully, it is time to configure the [broker](/provers/proving-stack#what-is-the-broker). The [Boundless CLI](/developers/tooling/cli) provides an interactive setup wizard (`boundless prover generate-config`) that derives optimised settings from your machine and writes them to [broker.toml](/provers/broker#settings-in-brokertoml) and the compose files.
The Boundless repo ships two compose files:
* [`prover-compose.yml`](https://github.com/boundless-xyz/boundless/blob/main/prover-compose.yml): the default prover stack (Redis-only, uses the prebuilt `prover-agent` image). `just bento` and `just prover` run this unless `PROVER_STACK=legacy` is set.
* [`compose.yml`](https://github.com/boundless-xyz/boundless/blob/main/compose.yml): the legacy/dev stack (Postgres + MinIO + Redis, builds the agent image locally).
The setup wizard writes the same derived settings (currently `exec_agent` replica count and `SEGMENT_SIZE`) to both files, so you only need to edit the one matching the stack you run.
### Install the Boundless CLI
First, install the Boundless CLI (the Boundless CLI is separate to the Bento CLI we installed earlier):
```bash theme={null}
cargo install --locked --git https://github.com/boundless-xyz/boundless boundless-cli --branch release-2.0 --bin boundless
```
Once installed, run `boundless` to check it has been installed properly:
 ### Run the Prover Setup Wizard
To run the prover setup wizard, run:
```bash theme={null}
boundless prover generate-config
```
and an interactive prompt will appear:
### Run the Prover Setup Wizard
To run the prover setup wizard, run:
```bash theme={null}
boundless prover generate-config
```
and an interactive prompt will appear:
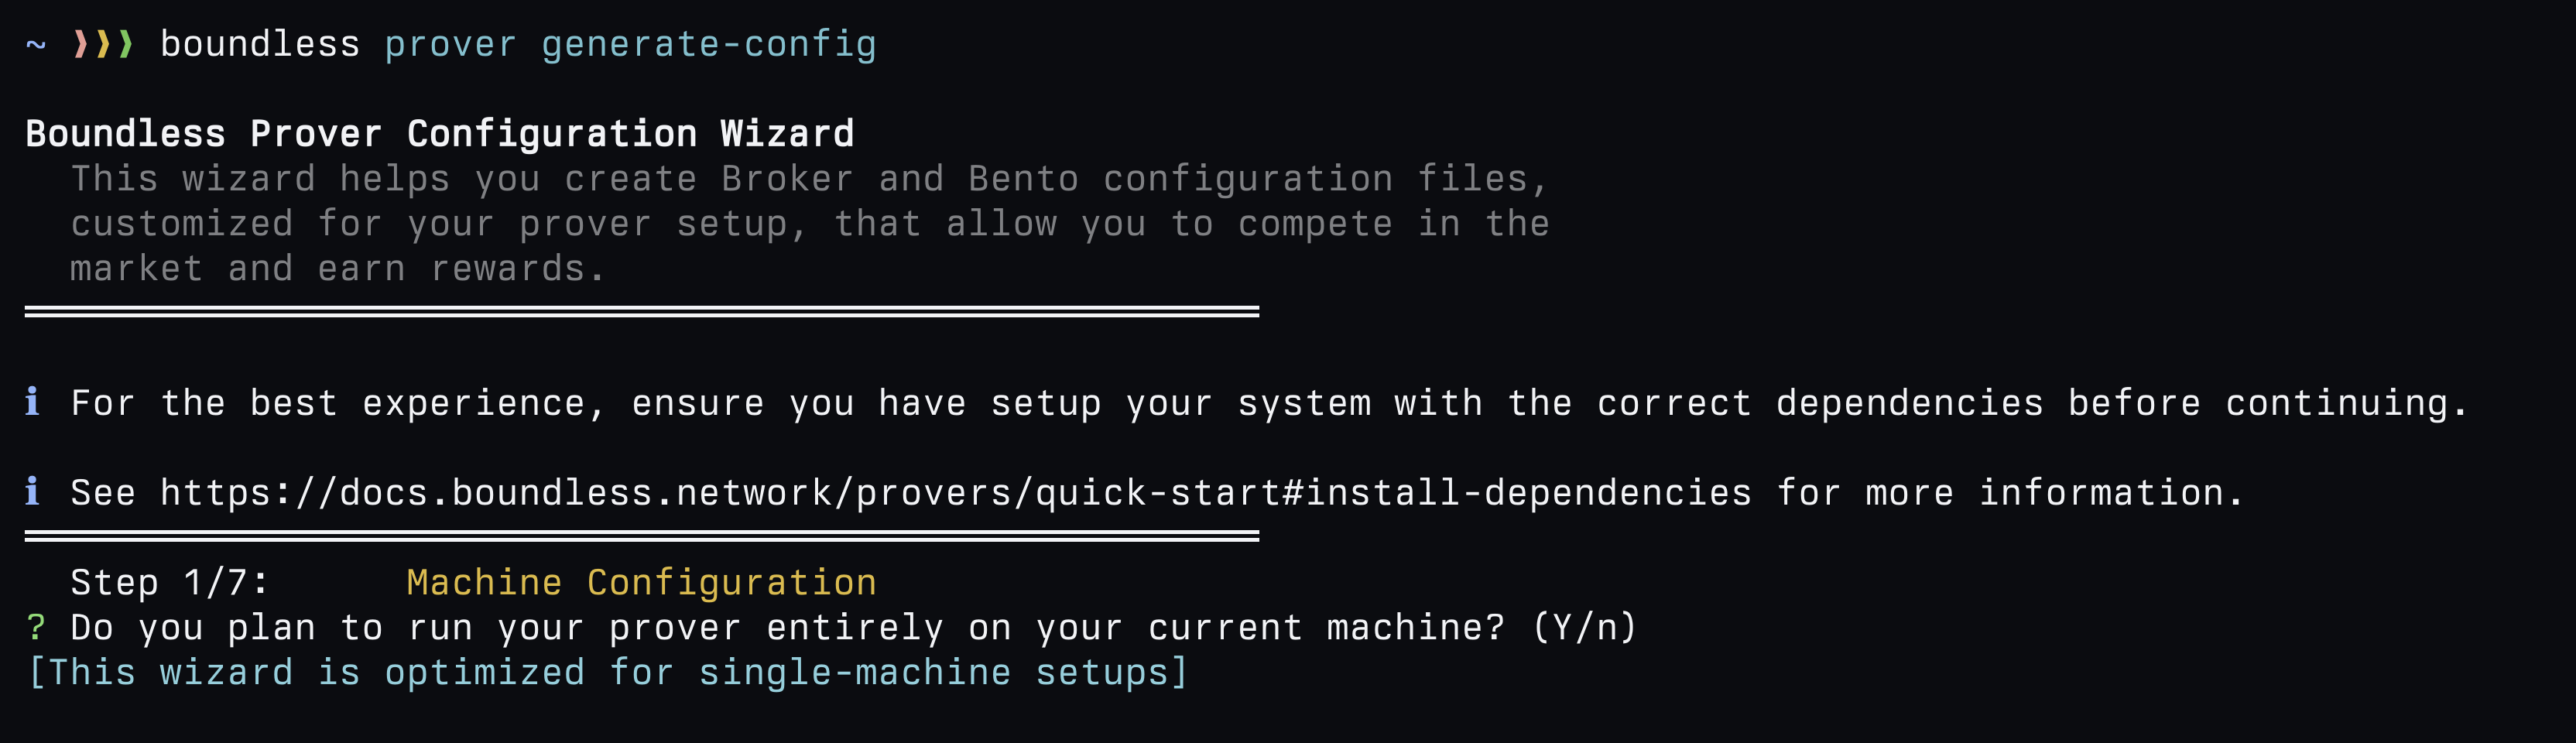 Answer the questions as required, based on your setup and requirements. Once finished, `broker.toml`, `prover-compose.yml`, and `compose.yml` will be created/edited with the same derived settings.
## Running the Broker
For technical support, please post your questions on the [Boundless Discussions Forum](https://github.com/boundless-xyz/boundless/discussions).
We have checked that bento successfully generated a test proof. We are now ready to run the broker so that we can start proving on Boundless.
### Deposit Collateral
*\$ZKC* is only on Ethereum mainnet.
Therefore, to use *$ZKC* as proving collateral, provers have to first [bridge *$ZKC*]\(/zkc/collateral) from Ethereum mainnet to Base mainnet.
With the [environment variables](/provers/quick-start#setup-environment-variables) set, you can now deposit *\$ZKC* tokens as collateral to your account balance:
```bash Terminal theme={null}
boundless prover deposit-collateral 50
```
### Start Prover
You can now start the prover (which runs both bento + broker i.e. the full proving stack!):
```bash Terminal theme={null}
just prover
```
To check the proving logs, you can use:
```bash Terminal theme={null}
just prover logs
```
### Stop Broker
To stop broker, you can run:
```bash Terminal theme={null}
just prover down
```
Or remove all volumes and data from the service:
```bash Terminal theme={null}
just prover clean
```
## Configuring Broker
### Custom Environment
Instead of passing environment variables for each shell session as we did above, you can set them in `.env.broker`. There is an [.env.broker-template](https://github.com/boundless-xyz/boundless/blob/main/.env.broker-template) available for you to get started:
```bash Terminal theme={null}
cp .env.broker-template .env.broker
```
After which, you can use a text editor to adjust the environment variables as required.
To run prover with a custom environment file:
```bash Terminal theme={null}
just prover up ./.env.broker
just prover down ./.env.broker
```
### Broker.toml
Broker can be configured using the [Broker.toml](https://github.com/boundless-xyz/boundless/blob/main/broker.toml) configuration file.
For example, to adjust the maximum number of proofs that can be processed at once, you can set:
```toml [boundless/Broker.toml] theme={null}
# Maximum number of concurrent proofs that can be processed at once
max_concurrent_proofs = 2 # change "2"
```
To see all Broker.toml configuration settings, please see [Broker Configuration & Operation/Settings in Broker.toml](/provers/broker#settings-in-brokertoml).
### Multi Host
Services can be run on other hosts, as long as the IP addresses for things link PostgreSQL / Redis / MinIO are updated on the remote host.
See the `.env.broker-template` HOST configuration options [here](https://github.com/boundless-xyz/boundless/blob/main/.env.broker-template) to adjust them.
## Configuring Bento
The compose file defines all services within Bento. By default, `just bento` and `just prover` use [`prover-compose.yml`](https://github.com/boundless-xyz/boundless/blob/main/prover-compose.yml); the legacy [`compose.yml`](https://github.com/boundless-xyz/boundless/blob/main/compose.yml) is used when `PROVER_STACK=legacy` is set. The examples below show `prover-compose.yml`; equivalent stanzas exist in `compose.yml`.
### Multi GPU
The `gpu_prove_agent` service auto-detects all GPUs visible to the container and spawns one prove agent per GPU; no manual per-GPU configuration is needed for the common case. To verify which GPUs Bento will use, run:
```bash Terminal theme={null}
nvidia-smi -L
```
which should output something like:
```bash theme={null}
GPU 0: NVIDIA GeForce RTX 3090 (UUID: GPU-abcde123-4567-8901-2345-abcdef678901)
GPU 1: NVIDIA GeForce RTX 3090 (UUID: GPU-fedcb987-6543-2109-8765-abcdef123456)
```
All listed GPUs are picked up automatically; no compose changes are required. To restrict Bento to a subset of GPUs on a host, configure visibility at the host level (e.g. dedicate the prover machine to Boundless, or use the NVIDIA driver or Docker daemon to control GPU visibility). The recommended Boundless setup is to give the prover a host with exactly the GPUs you want it to use.
### Segment Size
Larger `SEGMENT_SIZE` values also impact the proving systems conjectured security bits slightly (see [RISC Zero - Cryptographic Security Model](https://dev.risczero.com/api/security-model#how-secure-are-the-stark-provers)).
`SEGMENT_SIZE` is specified in powers-of-two (po2). Larger segment sizes are preferable for performance, but require more GPU VRAM. To pick the right `SEGMENT_SIZE` for your GPU VRAM, see [the performance optimization page](/provers/performance-optimization#finding-the-maximum-segment_size-for-gpu-vram).
#### Setting SEGMENT\_SIZE
The recommended way to change the segment size is to set the environment variable `SEGMENT_SIZE`, before running broker, to your specified value. This can be done through the [.env.broker](/provers/quick-start#custom-environment) file.
You can also configure `SEGMENT_SIZE` directly in `prover-compose.yml`; it lives in the `x-exec-agent-common` anchor that the `exec_agent` service inherits from, and defaults to 21:
```yml prover-compose.yml theme={null}
x-exec-agent-common: &exec-agent-common
<<: *agent-common
mem_limit: 4G
cpus: 3
environment:
<<: *base-environment
RISC0_KECCAK_PO2: ${RISC0_KECCAK_PO2:-17}
SEGMENT_SIZE: ${SEGMENT_SIZE:-21} # [!code hl]
REDIS_TTL: ${REDIS_TTL:-57600}
entrypoint:
[
"/bin/sh",
"-c",
"/app/agent -t exec --segment-po2 $$SEGMENT_SIZE --redis-ttl $$REDIS_TTL",
]
```
## What next?
For technical support, please post your questions on the [Boundless Discussions Forum](https://github.com/boundless-xyz/boundless/discussions).
Next, you'll need to tune your Broker's settings, please see [Broker Optimization](/provers/broker#broker-optimization).
If you'd like to learn more about the technical design of Bento, please see the [Bento Technical Design](/provers/bento).
To see your prover market statistics, check out the [provers](https://explorer.boundless.network/provers) page on the Boundless Explorer.
Answer the questions as required, based on your setup and requirements. Once finished, `broker.toml`, `prover-compose.yml`, and `compose.yml` will be created/edited with the same derived settings.
## Running the Broker
For technical support, please post your questions on the [Boundless Discussions Forum](https://github.com/boundless-xyz/boundless/discussions).
We have checked that bento successfully generated a test proof. We are now ready to run the broker so that we can start proving on Boundless.
### Deposit Collateral
*\$ZKC* is only on Ethereum mainnet.
Therefore, to use *$ZKC* as proving collateral, provers have to first [bridge *$ZKC*]\(/zkc/collateral) from Ethereum mainnet to Base mainnet.
With the [environment variables](/provers/quick-start#setup-environment-variables) set, you can now deposit *\$ZKC* tokens as collateral to your account balance:
```bash Terminal theme={null}
boundless prover deposit-collateral 50
```
### Start Prover
You can now start the prover (which runs both bento + broker i.e. the full proving stack!):
```bash Terminal theme={null}
just prover
```
To check the proving logs, you can use:
```bash Terminal theme={null}
just prover logs
```
### Stop Broker
To stop broker, you can run:
```bash Terminal theme={null}
just prover down
```
Or remove all volumes and data from the service:
```bash Terminal theme={null}
just prover clean
```
## Configuring Broker
### Custom Environment
Instead of passing environment variables for each shell session as we did above, you can set them in `.env.broker`. There is an [.env.broker-template](https://github.com/boundless-xyz/boundless/blob/main/.env.broker-template) available for you to get started:
```bash Terminal theme={null}
cp .env.broker-template .env.broker
```
After which, you can use a text editor to adjust the environment variables as required.
To run prover with a custom environment file:
```bash Terminal theme={null}
just prover up ./.env.broker
just prover down ./.env.broker
```
### Broker.toml
Broker can be configured using the [Broker.toml](https://github.com/boundless-xyz/boundless/blob/main/broker.toml) configuration file.
For example, to adjust the maximum number of proofs that can be processed at once, you can set:
```toml [boundless/Broker.toml] theme={null}
# Maximum number of concurrent proofs that can be processed at once
max_concurrent_proofs = 2 # change "2"
```
To see all Broker.toml configuration settings, please see [Broker Configuration & Operation/Settings in Broker.toml](/provers/broker#settings-in-brokertoml).
### Multi Host
Services can be run on other hosts, as long as the IP addresses for things link PostgreSQL / Redis / MinIO are updated on the remote host.
See the `.env.broker-template` HOST configuration options [here](https://github.com/boundless-xyz/boundless/blob/main/.env.broker-template) to adjust them.
## Configuring Bento
The compose file defines all services within Bento. By default, `just bento` and `just prover` use [`prover-compose.yml`](https://github.com/boundless-xyz/boundless/blob/main/prover-compose.yml); the legacy [`compose.yml`](https://github.com/boundless-xyz/boundless/blob/main/compose.yml) is used when `PROVER_STACK=legacy` is set. The examples below show `prover-compose.yml`; equivalent stanzas exist in `compose.yml`.
### Multi GPU
The `gpu_prove_agent` service auto-detects all GPUs visible to the container and spawns one prove agent per GPU; no manual per-GPU configuration is needed for the common case. To verify which GPUs Bento will use, run:
```bash Terminal theme={null}
nvidia-smi -L
```
which should output something like:
```bash theme={null}
GPU 0: NVIDIA GeForce RTX 3090 (UUID: GPU-abcde123-4567-8901-2345-abcdef678901)
GPU 1: NVIDIA GeForce RTX 3090 (UUID: GPU-fedcb987-6543-2109-8765-abcdef123456)
```
All listed GPUs are picked up automatically; no compose changes are required. To restrict Bento to a subset of GPUs on a host, configure visibility at the host level (e.g. dedicate the prover machine to Boundless, or use the NVIDIA driver or Docker daemon to control GPU visibility). The recommended Boundless setup is to give the prover a host with exactly the GPUs you want it to use.
### Segment Size
Larger `SEGMENT_SIZE` values also impact the proving systems conjectured security bits slightly (see [RISC Zero - Cryptographic Security Model](https://dev.risczero.com/api/security-model#how-secure-are-the-stark-provers)).
`SEGMENT_SIZE` is specified in powers-of-two (po2). Larger segment sizes are preferable for performance, but require more GPU VRAM. To pick the right `SEGMENT_SIZE` for your GPU VRAM, see [the performance optimization page](/provers/performance-optimization#finding-the-maximum-segment_size-for-gpu-vram).
#### Setting SEGMENT\_SIZE
The recommended way to change the segment size is to set the environment variable `SEGMENT_SIZE`, before running broker, to your specified value. This can be done through the [.env.broker](/provers/quick-start#custom-environment) file.
You can also configure `SEGMENT_SIZE` directly in `prover-compose.yml`; it lives in the `x-exec-agent-common` anchor that the `exec_agent` service inherits from, and defaults to 21:
```yml prover-compose.yml theme={null}
x-exec-agent-common: &exec-agent-common
<<: *agent-common
mem_limit: 4G
cpus: 3
environment:
<<: *base-environment
RISC0_KECCAK_PO2: ${RISC0_KECCAK_PO2:-17}
SEGMENT_SIZE: ${SEGMENT_SIZE:-21} # [!code hl]
REDIS_TTL: ${REDIS_TTL:-57600}
entrypoint:
[
"/bin/sh",
"-c",
"/app/agent -t exec --segment-po2 $$SEGMENT_SIZE --redis-ttl $$REDIS_TTL",
]
```
## What next?
For technical support, please post your questions on the [Boundless Discussions Forum](https://github.com/boundless-xyz/boundless/discussions).
Next, you'll need to tune your Broker's settings, please see [Broker Optimization](/provers/broker#broker-optimization).
If you'd like to learn more about the technical design of Bento, please see the [Bento Technical Design](/provers/bento).
To see your prover market statistics, check out the [provers](https://explorer.boundless.network/provers) page on the Boundless Explorer.